
Home Page | Learning to Fly Fixed Wing | Learning to Fly RC Helicopters | BMFA Website
Learning To Fly Fixed Wing |
||||||||||||
This article is for people interested in learning to fly radio control IC (internal combustion) engine aeroplanes. So you want to learn to fly radio control model aeroplanes?1. The first thing is the right attitude. There is the financial expense in buying a model and equipment for RC (radio control) model flying. However it will also take a lot of your time to learn - you wont learn in a day, or a week, or even a month. You you will need to be able to commit a lot of time on a regular basis to be down 'the patch'. If so, then possibly over a summer you will be flying solo. You have to be prepared for set backs and frustrations, and even more expense (the expense aspect never actually ends). So you will need to have the wallet & determination to persevere into what is a absorbing, fascinating and very diverse hobby. 2. Equipment Top of Page
As you gain experience you may like to try your hand at building your own model. Kits are available (as shown below) which are essentially a box of wood and assorted parts with plans to build from. You can see some construction threads on the mmfc forum to get the idea. Later you may even go on to just buying a plan and building it. However for those starting out, ARTF offers the simplest and cheapest introduction to model flying.
2b.Radio control Top of Page
At extra expense an electric starter (which keeps fingers away from propellors - See pic left) can be purchased for turning the propellor and requires a 12v battery for power. Once the engine is running satisfactorily the glow start is removed.
A point to note: in order to teach , the instructor sacrifices time when he could be flying his own models. A student who is enthusiastic, gets down the flying field at every opportunity and politely badgers for flights shows the instructor their time will not be wasted. If the novice appears not particularly bothered, then instructors are unlikely to put themselves out. People lead busy lives often the decision to 'go flying' is at very short notice and combined with the vagaries of weather make training appointments difficult. Realistically the novice will need to try and get down the field at every opportunity (when the weather is suitable for flying) and hope an instructor will be flying. Obviously this can be frustrating for the novice. . The club requires 'buddy lead' learning where two transmitters are connected via a lead (buddy lead). The instructors Tx (master Tx) is the only one with xtal fitted and switched on with antenna extended. The students Tx (slave Tx) is not usually switched on as it draws power from the master Tx, should not have a xtall and need not have the antenna extended. Switching on the slave Tx can cause damage so care should be taken to follow manufacturers instructions. The instructors master Tx will have a 'trainer switch'. When held down control is passed to the students slave Tx. However, as soon as the instructor releases the trainer switch control reverts back to his Tx . A major advantage of the buddy lead is the instructor decides when to take over , without the delay and potential disaster in trying to 'grab back' the Tx from the student. Generally each training flight takes between 10-20 minutes (and will seem to last a lot longer - the intensity of concentration required when learning is immense)
The club requires a flying competence test be satisfactorily passed before new members may fly solo i.e. without an instructor and buddy lead. The test is carried out by 2 designated club members. The test is not particularly formal, the emphasis is that a person can fly and operate model aircraft - SAFELY. 5. Learning To Fly - How long does it take ? Top of Page Well how longs a piece of string ? One things for sure - The more often you go flying the quicker you learn and as mentioned a simulator that replicates the Tx controls can greatly speed up the process of making thumbs move sticks automatically. .
People only learn by experience and one of the aspects that keeps RC flying interesting is there is so much choice and diversity. You never stop learning or run out of new things to try. Wether your into aerobatic models, scale models, electric engine, glow engine, petrol, co2, diesel, gliders, free flight, helicopters etc. From building to designing model aircraft there is something for everyone. Some things most of us have to learn the hard way. When you hit a tree, you learn to respect trees and understand about 'perspective'. Not sitting in your model it can be very difficult to judge where it is in relation to other objects e.g. trees. When the engine stops (dead stick) and you try a tight turn that the model is not capable of (so drops out of the sky and crashes) you learn more about a models capabilites and stall point. The list is endless and it's what makes model flying an achievement and so rewarding. Keep Flying Alistair Clinton
|
||||||||||||
By Adrian Hawley January 2007 Top of Page
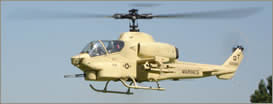
Today there a many different manufacturers all offering very good helicopters. You don’t usually see a bad helicopter only a bad builder/pilot. As part of your question asking, find out what others are flying in the local area. It doesn’t mean you have to copy them but it will certainly help you if there is someone who has experience with that particular brand or model. How High? How fast?, How much? How do I persuade the wife?
However, there are nowadays helicopters in between these. E.g. 46 and 50 size, and those bigger than 60. 90 size and turbines (jets) are now commonplace but are normally beyond the wallet and flying capability of the humble learner. There is also a large market now for mini battery powered helicopters suited for indoor flying. (more of those later!) Models are powered by either an internal combustion 2 stroke engine (known as i.c), fuelled by model fuel or petrol (gas for the American market), gas turbine or electric, running on batteries (becoming very popular), or even an umbilical cord from the mains. So quite a choice.
Keep in mind, when learning to fly a helicopter you are more than likely to have a crash or two, (or three or four in my case!) and parts are going to have to be replaced. So we have decided, a good place to start would be a heli designed for a .30ish size engine, a stable flyer with collective pitch, and one with a good availability of parts. One thing to add here is to if possible, purchase the kit version as opposed to the ARTF (Almost Ready To Fly). The logic here is that Adrian Hawley
Heli history
The whole heli package has so far cost you several hundred of pounds, but a good choice of radio equipment here will pay dividends later…..trust me! As with everything so far choose the best you can afford, and indeed one you like, or are happy with, again advice from others may help. The logic here is that as your flying skills improve you will want to do more with your helicopter. A budget radio will help you no doubt, but you are then limited by what the radio can do. It can be frustrating. The second part of the logic is that should you wish to give up the hobby (god forbid!), you stand a better chance of selling a better specification radio. The two main providers of radios in the UK are Futaba and JR, both very fine manufacturers, and you may need to decide you own way to go. Without copying someone else, you may find it easier if others on your new model club have the same make.
All kits will have a sequence of jobs to complete, this is done this way for a reason so do the steps exactly as instructed, and you should not be disappointed with the results. Always work in a clean environment. Wait until you can get a nice clean table with no real distractions. You would be surprised how much quicker this makes it go together. Work on the dining room table with care, they seem to scratch easily, we don’t want to upset anyone just yet! And if you drop a screw/nut, you will discover that your carpet will eat it! You then spend the next 15 minutes on all fours looking for that one tiny nut! (Again ask me how I know!) Make sure all wiring is neatly routed throughout your helicopter and again your manual may well give you tie wraps or similar to said this part. Any extension servo leads used tie the plug and socket together to avoid separation during flight. The plug from the gyro is a common one.
So lets check where we are. You have bought this nice new easy to build, radio controlled helicopter, persuaded your loved one it isn’t a “fad”. Sought lots of advice along the way, got it home, lovingly built it, installed the radio gear, added the engine and muffler. So all seems well in the world! But of course you now, like Dr Frankenstein, you want to see you creation come alive! Adrian Hawley |
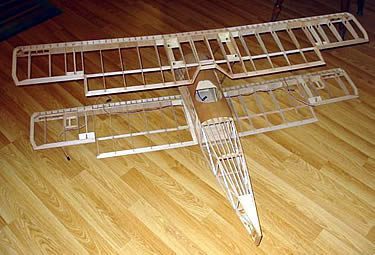
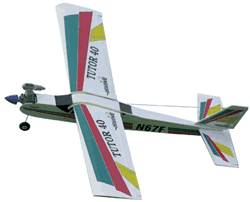 2a. An ARTF (almost ready to fly) Trainer type model aeroplane of the type on the left.
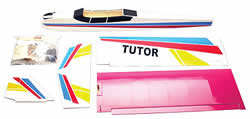 ARTF models have most of the building work already completed (see right) e.g. the wings are pre-built and covered, just require glueing together. Similarly with other parts such as the tail section gluing into fuselage. Usually the instructions are aimed at the 'first time builder' and a weekend is all that is required to complete the assembly, install the engine and radio control items and appropriate movement of control surfaces per the instructions..
 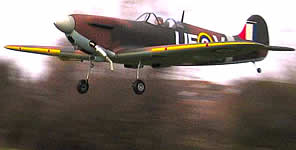 Trainers are fun to fly and have forgiving flying characteristics so are ideal for for learning. You may like the idea of flying a 'warbird' like a Spitfire or Mustang but these are much less forgiving than trainers and will often have 'vices' to catch out the novice.
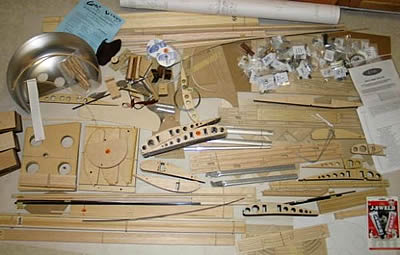

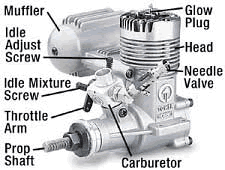 2c. Engine & Glow Start
  The glow plug has a 'glowing' coil element. Once the engine is running the element is kept hot enough to keep igniting the fuel.
 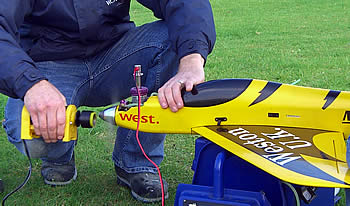 The initial starting of the engine is carried out using a glow start to make the glow plug element 'glow'. (as shown in the picture left) For starting the engine experienced pilots will 'hand start' engines by 'flicking' the propellor, to cause compression and ignition from the glow plug which is 'lit' by the glow start. Often a 'chicken' stick or finger guard can be used help protect fingers when hand starting.
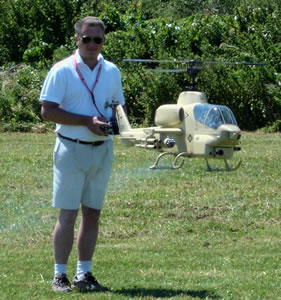
 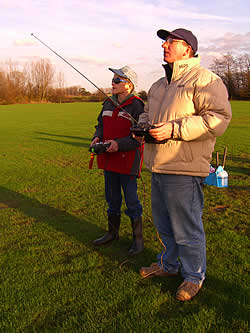 3. An instructor
 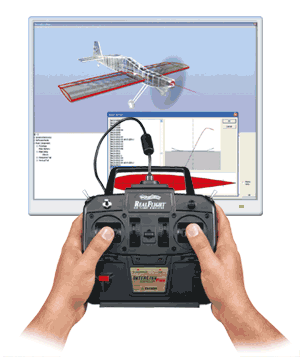 4. Simulators
  6. After You Have Passed Your Test.
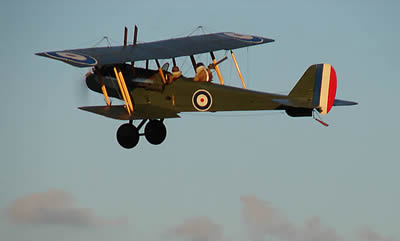
 Where Do I Start?
 Don’t necessarily be swayed by what the local shop has to offer, shop around, some (not all) could try to sell you what they want to sell you not necessarily what you want or need. A word about Internet sales here. The Internet is a powerful medium for buying everything you require for this hobby and normally at a discount to the local shop. But what it cant sell you is one to one advice, support, training and outright experience. Support that local shop, and you will find you will have support back long after your initial sale. If you buy your new helicopter from an Internet site it’s hardly fair to ask your local shopkeeper to set up or test fly the heli now is it?
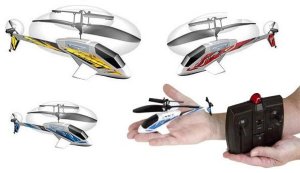 In its basic format there are two main sizes of model helicopter, known as 30 and 60 size. Now the size actually relates to the engine capacity rather than any real dimensions of a model, but its fairly safe to say that a smaller engine will need a smaller frame and a larger engine a larger frame.
 So by now you have probably decided on the first purchase, based on all that research you did! But before you finally part with all that hard earned cash, why not just check with that local club member you met, and discuss your pending choice. He will probably have a better know how of parts and costs, and more often or not offer advice to make you feel confident in that purchase
 So we have established what sort of helicopter we want, we have asked lots of questions, and we have our new pride and joy purchased and sat at home ready for all to admire!
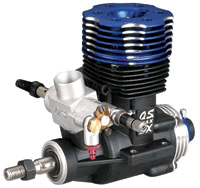 Engines & stuff
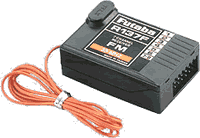
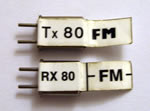
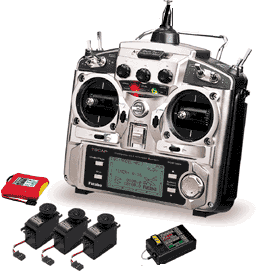 Amongst all the other boxes you came home with would be one containing the radio gear. This is more often than not in the RC world referred to as the TX. Obviously without this there would be no radio control, in fact no control at all! The opposite end to this is the receiver, (titled the RX).
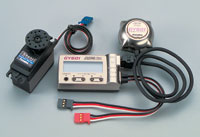 Gyroscopes (gyro in pilot language).
  Tools& building
 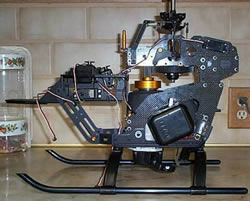 Take your time. Simple as that! Quality of build should be your aim at all times. Don't rush construction and
 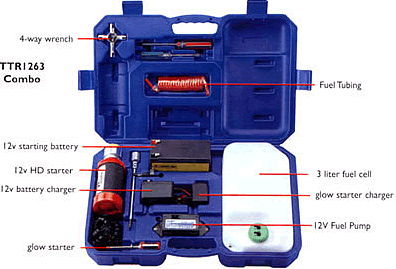 Starter equipment